Sentiment Analysis - Docker / AWS implementation
Project and deployment documentation
The Idea
- Why sentiment analysis was chosen as an idea?
- Sentiment analysis was chosen because it allows us to gather valuable insights about customer opinion on a product, which is a crucial aspect of business decision-making.
- Implementing sentiment analysis demonstrates my expertise in Natural Language Processing (NLP) and showcases my profeciency in AI.
- The project involves hosting the sentiment analysis system on AWS (Amazon Web Services) OR utilizing Docker for containerization, showcasing my skills in full pipeline development from deployment to production.
The Data
- What the data was and how it was collected?
- The data used for this project was collected from Twitter. Specifically, the data consisted of sentiment-labeled tweets obtained from previous challenges related to the ongoing “SemEval” series of evaluation and computational semantic analysis.
- The data collected process involved gathering and merging sentiment-tagged tweets. The tweets had already been tagged with either positive or negative sentiment labels.
- The project did not consider neutral sentiment texts, and it was a deliberate choice made to showcase the feasibility of me developing the project. However, this requirement can be modified if necessary for future cases.
Positive Wordcloud
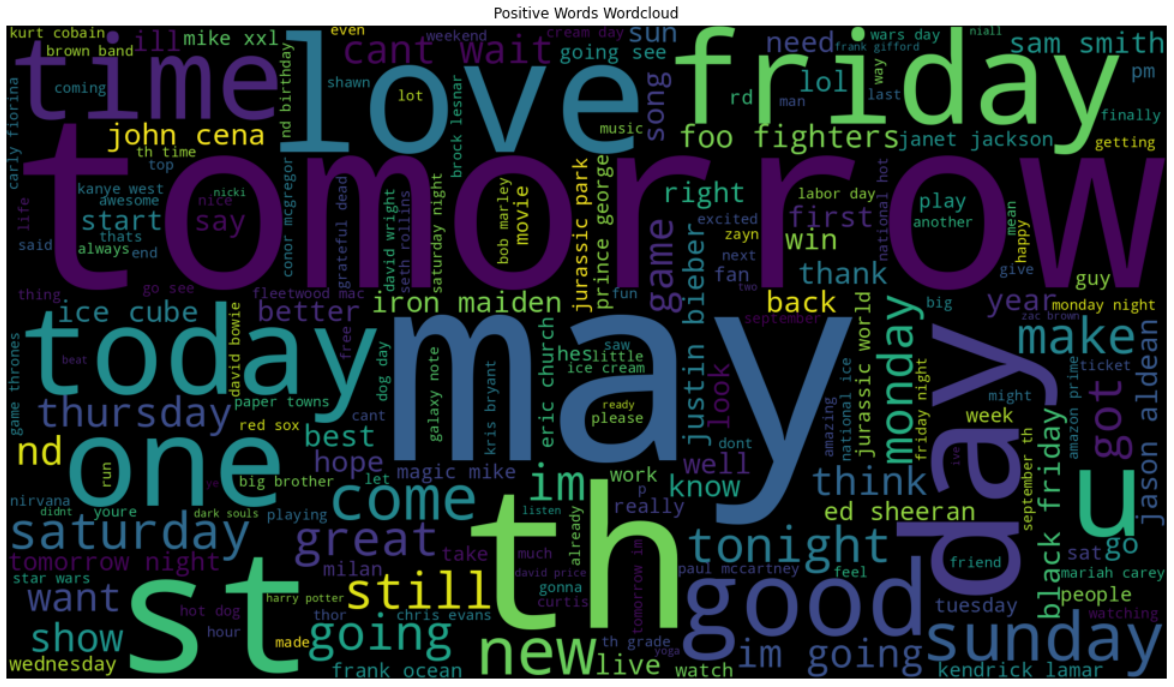 Wordcloud showing the most commonly used positive words present in the text
Negative Wordcloud
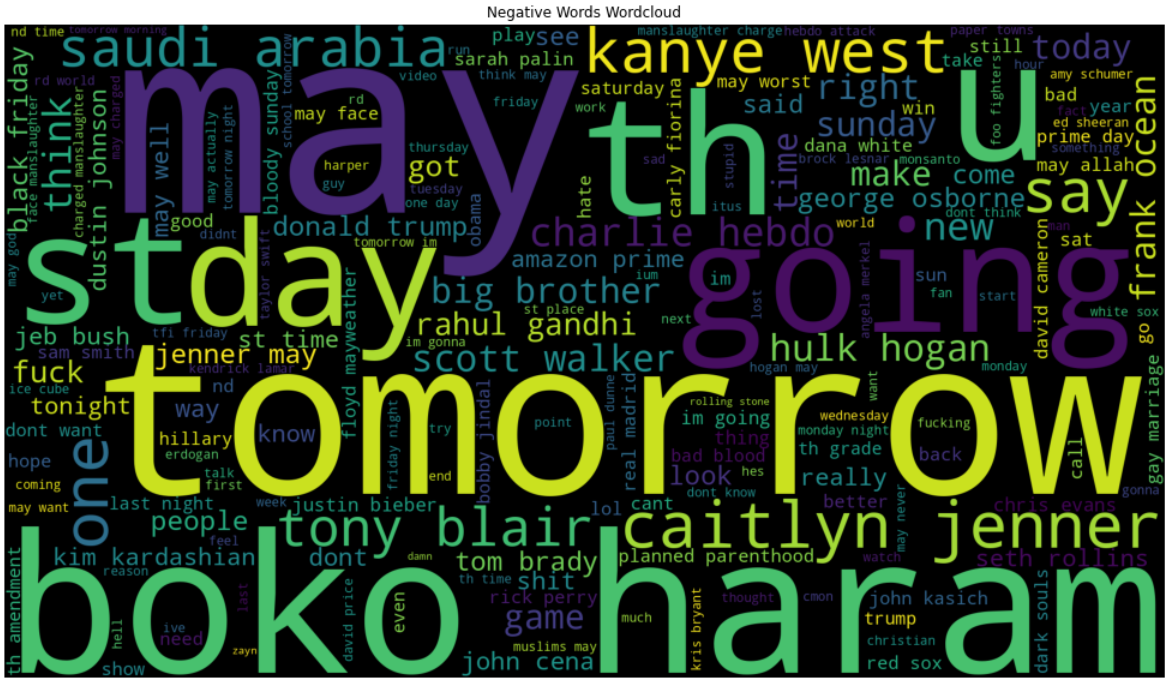 Wordcloud showing the most commonly used negative words present in the text
Commonly used Positive Words frequency
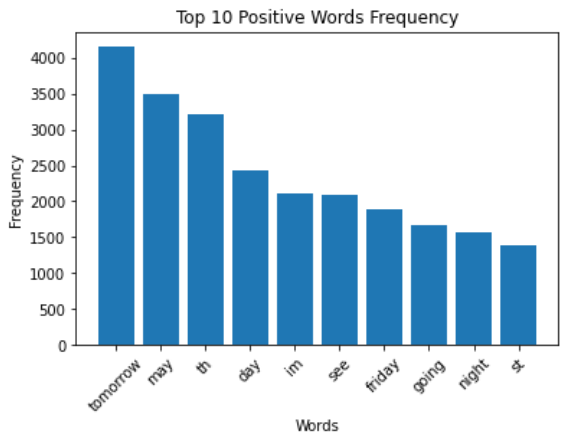
Barplot showing the frequency of the commonly used positive words present in the text
Commonly used Negative Words frequency
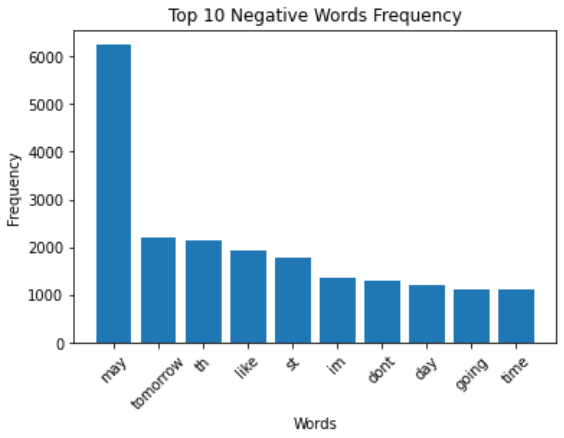
Barplot showing the frequency of the commonly used negative words present in the text
Data Processing
- Data pre-processing steps included cleaning the input text by removing HTTP/HTTPS links, converting it to lowercase, eliminating punctuation, numbers, stopwords and reducing excessive whitespace.
- The data per class was balanced for training the model.
- These steps ensure that the data is standardized and free from irrelevant elements.
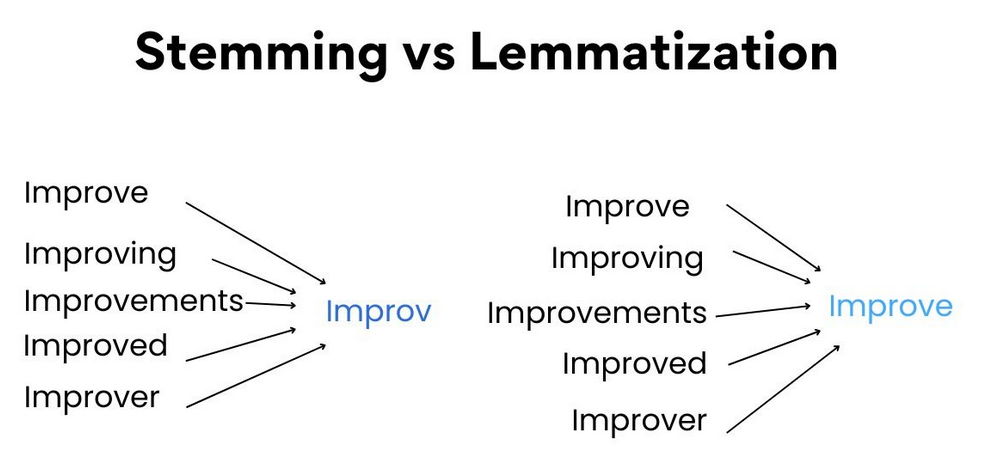
Stemming vs Lemmatization
Stemming vs Lemmatization Img Source
- Stemming simplifies words by removing suffixes, while lemmatization transforms words to their base form.
- Stemming is faster and applies simple rules, but the resulting stems may not be the actual words.
- Lemmatization considers word meawning and context, producing accurate base forms.
Fine-Tuning BERT language model
- Why did I fine-tune a model?
- The decision to fine-tune a model was made because training a model from scratch with the available data was not feasible due to limited data and the time it would have taken. However, various model configurations were explored during the process to reach this decision.
- What model was chosen for fine-tuning?
- The chosen model for fine-tuning was the base BERT (Bidirectional Encoder Representations from Transformers) model, as it was freely available (vs GPT model) and considerably suitable for the task at hand.
- How was the model fine-tuned?
- The model was fine-tuned by tokenizing the text with a maximum length of 18 tokens (value found experimentally). It was then compiled with Adam optimizer, using sparse categorical cross-entropy loss. The model underwent a total of 5 epochs during the fine-tuning training process.
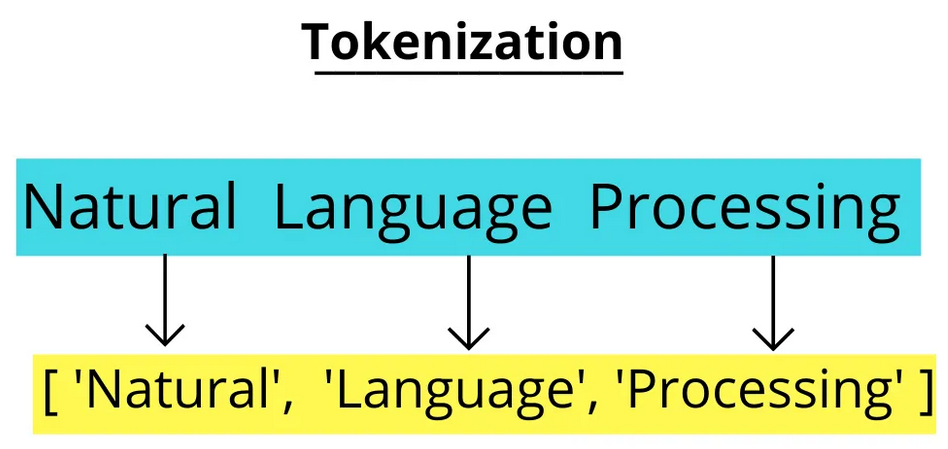
Tokenization in NLP
Tokenization Img Source
Tokenization is a fundamental process in NLP that breaks text into smaller units called tokens. These tokens can be words, characters, or subwords, depending on the tokenization strategy used.
The BERT Tokenizer used in this project is specifically designed for the BERT model. It employs a technique called WordPiece tokenization, which splits words into subwords. This approach allows the tokenizer to handle out-of-vocabulary (OOV) words and capture the more fine-grained linguistic information present in the text.
Deployment of trained model
The fine-tuned model was finally deployed in two different ways:
Locally Hosted Docker Image:
- The model was hosted within a Docker container locally using TFServing.
A RESTful API was set up to interact with the model for making predictions.
- The SentimentAnalyzer class performs sentiment analysis using an API endpoint.
- It takes the API url, a tokenizer, and a stoplist as parameters in its constructor.
- The clean_text() method cleans the input text by removing URLs, punctuation, numbers, and stop words.
- The make_prediction_api() method sends a POST request to the API and returns the predictions.
- The predict_sentiment() method cleans the text, tokenizes it, makes the API call, and returns the predicted sentiment, confidence level, and API response as a list.
class SentimentAnalyzer:
    def __init__(self, url, tokenizer, stoplist):
        self.url = url
        self.tokenizer = tokenizer
        self.stoplist = stoplist

    def clean_text(self, text):
        # Remove http / https links
        text = re.sub(r'http\S+|https\S+', '', text)
        # Convert to lowercase
        text = text.lower()
        # Remove punctuation
        text = text.translate(str.maketrans('', '', string.punctuation))
        # Remove numbers
        text = re.sub(r'\d+', '', text)
        # Remove stopwords
        text = ' '.join(word for word in text.split() if word not in stoplist)
        # Remove extra whitespaces
        text = re.sub(r'\s+', ' ', text).strip()
        return text

    def make_prediction_api(self, instances):
        data = json.dumps({"signature_name": "serving_default", "instances": instances})
        headers = {"content-type": "application/json"}
        json_response = requests.post(self.url, data=data, headers=headers)
        predictions = json.loads(json_response.text)
        return predictions

    def predict_sentiment(self, text):
        # Clean input text
        text = self.clean_text(text)

        # Tokenize the cleaned text
        encoded_input_api = self.tokenizer(
            text,
            max_length=18,
            padding="max_length",
            truncation=True,
            return_tensors='tf'
        )

        # Get text tensor values
        input_ids = encoded_input_api["input_ids"]
        attention_mask = encoded_input_api["attention_mask"]
        token_type_ids = encoded_input_api["token_type_ids"]

        # Prepare instance for API call
        instances_api = [{
            "input_ids": input_ids.numpy().tolist()[0],
            "attention_mask": attention_mask.numpy().tolist()[0],
            "token_type_ids": token_type_ids.numpy().tolist()[0]
        }]

        # Make API call
        result_api = self.make_prediction_api(instances_api)

        # Calculate Confidence level of the prediction and get the predicted label
        logits = result_api['predictions'][0]
        probabilities = tf.nn.softmax(logits)
        predicted_label = tf.argmax(probabilities).numpy()
        confidence_level = np.max(probabilities)

        # Map the predicted label to its corresponding sentiment category
        sentiment_categories = ["Negative", "Positive"]
        predicted_sentiment = sentiment_categories[predicted_label]

        return [result_api, predicted_sentiment, confidence_level]
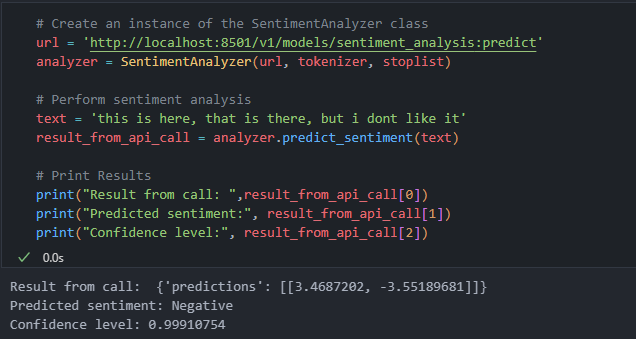
Output for calling this code:
AWS S3 Bucket Deployment (images below):
To deploy the trained model on AWS, the following steps were followed:
Creating a Flask Application:
The Flask application was developed to create an interface for the trained model.Setting up an EC2 Instance:
An EC2 instance was created on AWS to host the application.Configuring Deep Learning Amazon Machine Image:
A deep learning Amazon Machine Image (Ubuntu 20.04) was set up on the EC2 instance.Starting the Application on EC2 Instance:
Using WinSCP and putty, communication with the operating system on the cloud was established, and the Flask application was started and run on the EC2 instance.
In case of larger models or data, I would have used a S3 bucket to store and access the required resources.
Moreover, I attempted to leverage AWS Comprehend for the task. However, the process of fine-tuning the model with a custom dataset incurs costs, which I decided against at the moment. Nonetheless, this remains a feasible option that can be undertaken if necessary.
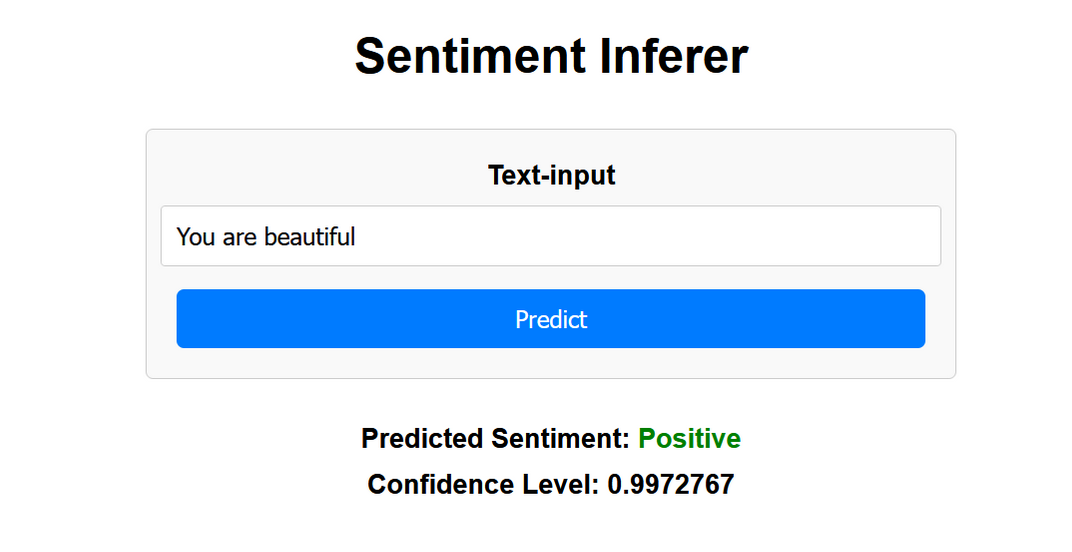
Positive Inference:
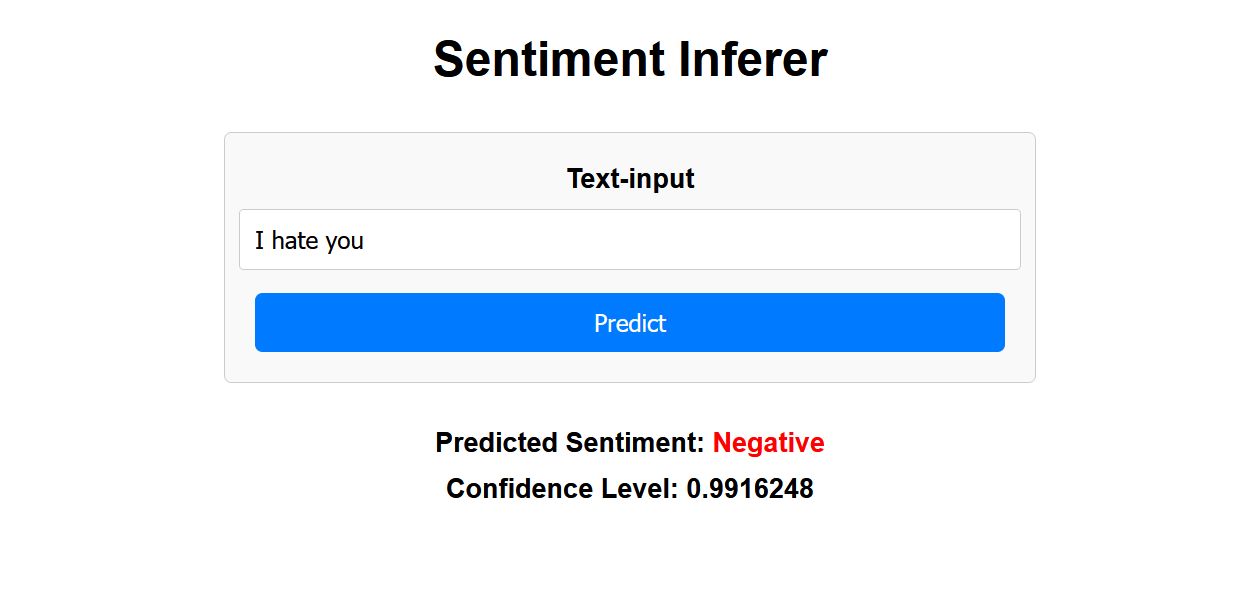
Negative Inference: